Week 5: 3D Scanning and Printing
As a group working with Stanley and Lauri under the instruction of Behnaz and Toni, we tested the design rules for a few 3D printers, which helped us understand the capabilities and limitations of different types of 3D printers. Prior to this, I had never used a 3d printer. I was suprised by how many different kindes of 3d printing there is and each has their own advantages and disadvantages. Moreover, I was also suprised by the fact that certain paramaters are needed to be noted so an object is properly printed. This was seen in angle and bridging as when the angle reached closer to 90 there was more and more sphagetti and in briding the longer the bridge the more it was unable to print as refinely. I was also surprised by the resin printer’s process and the impressive print quality it produces, especially for small details but it has a ardous afterprocess These lessons were useful for this week's individual work, where I 3D printed and scanned objects.
3D Printing
.jpg)
Why The object can't be made subtractively
This object—a hollow square with a free-rolling ball inside—cannot be made using subtractive methods because the internal ball is fully enclosed and inaccessible to cutting tools. Subtractive manufacturing requires tool access to remove material, which is not possible once the cavity is sealed. In contrast, additive manufacturing (like 3D printing) builds the object layer by layer, allowing the ball to be printed inside the enclosure without needing assembly, making this design uniquely suited for 3D printing.
Designing the object
I made the design in fusion 360.First, I started a new sketch and selected front view.
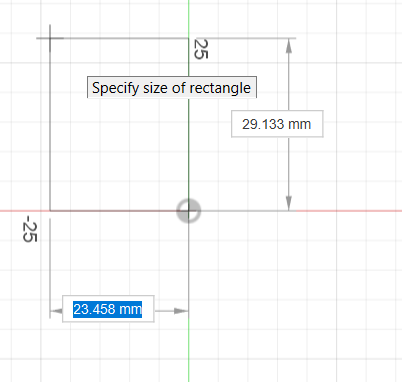
Then I created a centre rectangle and set the dimensions to 40mm x 40mm or esentially made a square.
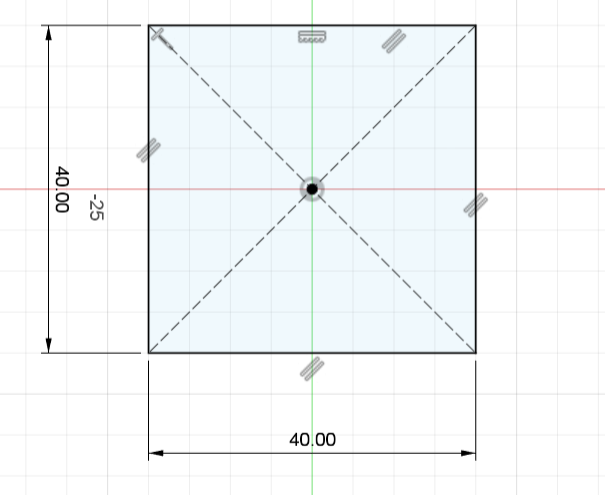
Afterwards, I completed the sketch and extrdued the square to 20mm height and formed a cube.Remember to select symmetric in the direction when extruding the cube
.png)

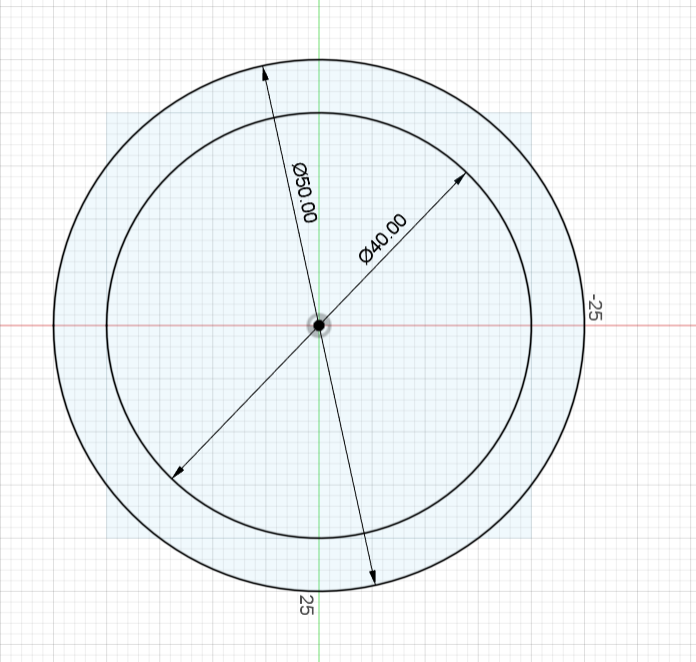
Then I created a new sketch on the front face of the cube and created a circle with 40mm diameter. I also hid the body so its easier to draw.
.png)
Then I created another circle with a diameter of 50mm
Then I extended a line from one end of the outer circle to the other end and then trimmed half of the circle
.png)
Then I pressed finnish sketch and then used the revolve function to essentially create a sphere. First I select both of the half circles and select the y axis
.png)
Then I select only the inner circle and revolve it to create the ball. First hide the body and select the sketch back to do this.
.png)
Exporting and Printing
- Since there are two different bodies, I used Projectionto create a new sketch with both bodies in one. This was done by creating sketch and clicking on projection and afterwards selecting both bodies and create sketch.
- Then I exported the file in stl format
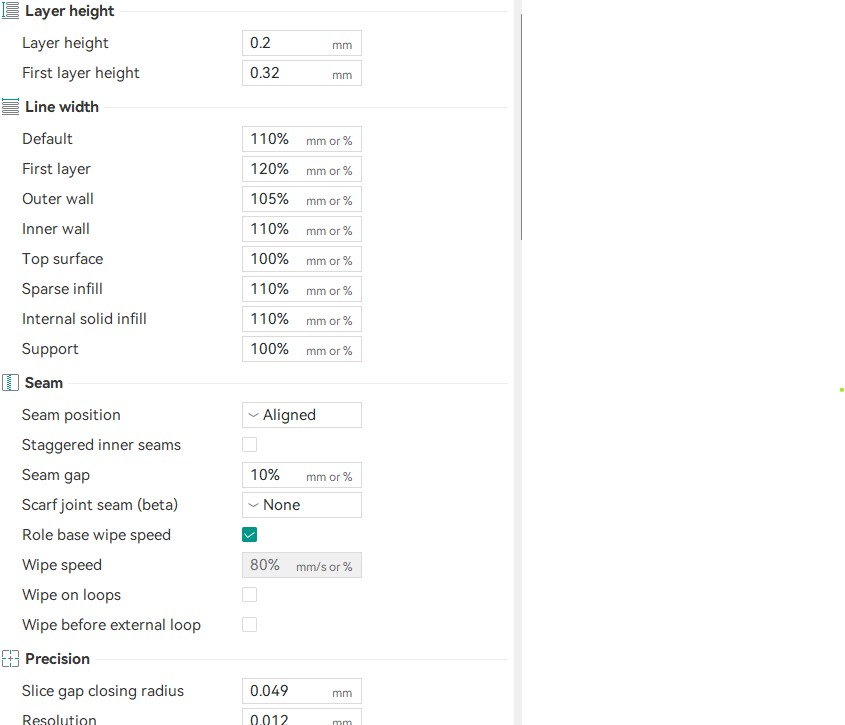
- Afterwards, I transferred the file to laser cutter computer and using Orca slicer to slice it
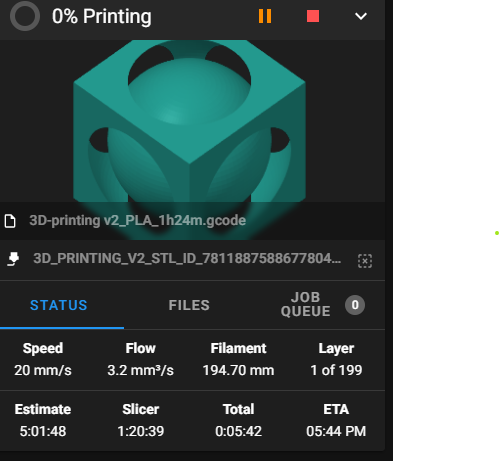
- The printer being used in this case was the Ender 3 pro
- Lastly, the file was then sent for printing
.png)
.png)
Changing Of Colour
In order to change the colour, I first heated up the extruder and I removed the material by pressing the lever and essentially pulled it out
Afterwards, I inserted the green PLA into the printer and kept doing it till the colour being excreted turned from black to green.
.jpg)
Note: The printer has some issues with bridging in the inital layers as it wasn't able to bridge the first few times properly at a certain height but afterwards it was able to cover it.
Final Product
.jpg)
3D Scanning
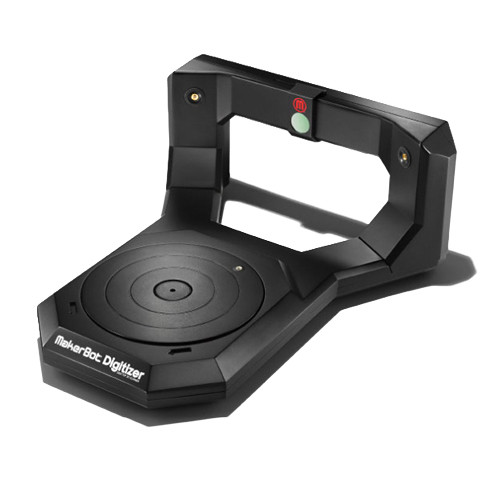
For 3D scanning, I used the Makerbot Digitizer scanner.
Process
- First, I set up the scanner and connected it to the computer.
- Then I opened the MakerWare for Digitizer software
- I placed the object on the turntable and ensured it was stable.
- I started the scan and stepped away as to not interfere with the scan
- Then, I scanned the object from multiple angles to ensure a complete capture.
- Finally, I exported the 3D model in STL format for further use.
.png)
.png)
.png)
.png)
.png)
Final Scanned Product
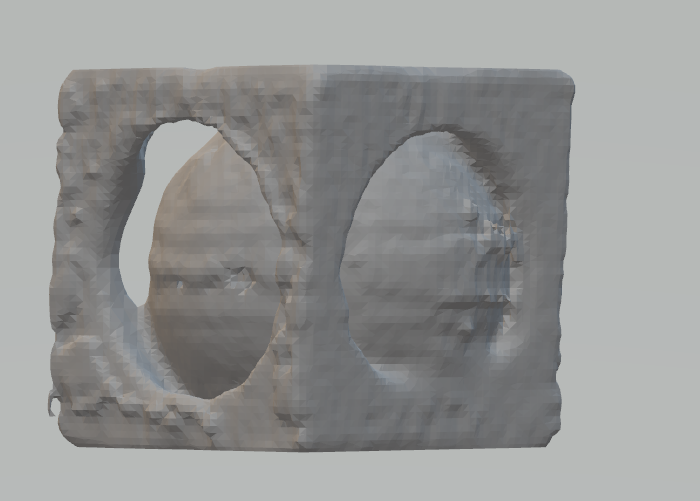
This is what the stl file looks like